|
Basic B&W Tones Tutorial (Photoshop + Painter)
Coloring your line work with black and white tones can be a very easy alternative to painting it in full color. But the results can potentially be just as engaging, giving the eye something it can really sink its teeth into. Now that I have you imagining some horrifying eye creature with teeth, I think we can begin.
I call this a “basic” tones tutorial because that's what it is. Nothing I do here is very time-consuming or rendering-intensive. The process is geared towards getting something striking-looking done quickly. This is the process I apply when coloring pages for Starlight Calliope. I could be spending excruciating hours on precise lighting and shadow, but I have like a bazillion pages to finish, so I can't spend too long on them or it'll never get done. This is a nice compromise between time spent and powerful visuals.
I'll walk you through the process with two pages at once. Start with all the cleaned up line work, with all the layers configured properly for flat coloring (process described here). Note all the lettering is done first. I'll hide the lettering when I start coloring.
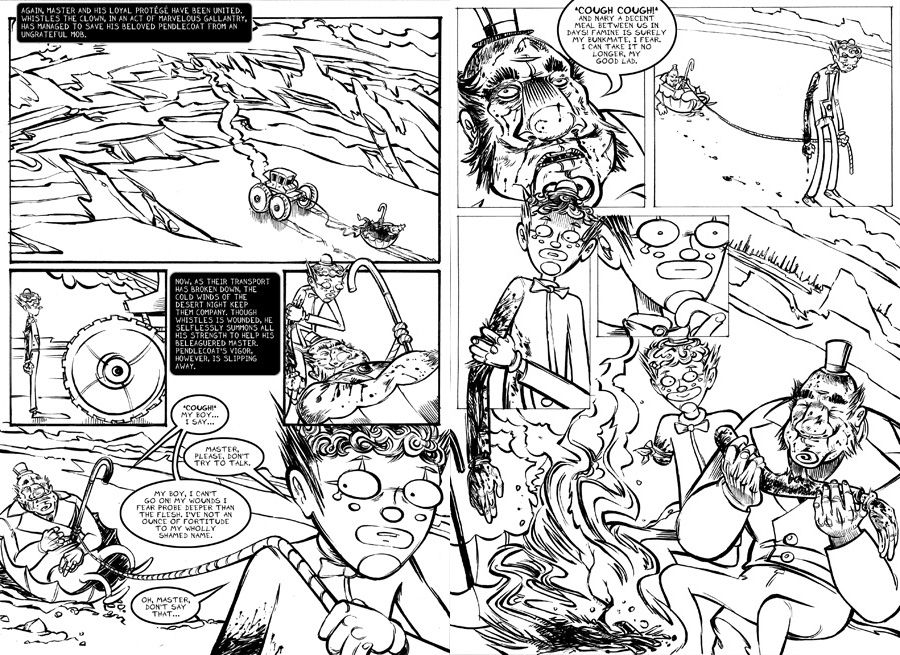
Next, paint all the flat forms. All this is covered by the flat coloring tutorial, using methods 2 and 3 (mostly 3). I'm not worrying in the least about what colors I'm using. They can all be changed later, using levels, or by refilling. The important thing is just to block out all the major areas, so that they can be used as masking surfaces later for more advanced things. But as it happens, these flat colors I applied are already fairly close to the final tones, just because I'm very used to the process, and tend to pick the color ranges I want right out of the box. But my point is, I feel it makes more sense not to mingle something delicate and creative like color selection with something so arduous and chore-like, like flat color fills. Flat coloring to me represents 90% of the sweat of this process. The rest may take some time too, but it's a lot more fun, so I don't notice. Just get the flats out of the way, then apply the creativity, which may involve tweaking or completely revamping the color scheme of the flats.
Also note, I'm not going to crazy here. Just filling major forms, like panels, characters etc. I could fill things like the bowtie, the eyes, etc, all individually if I really wanted to, but I find it adds unnecessary tedium to this shotgun process. I can always go back with the final touches and paint those things individually later. I'd rather just truncate the soul-draining flat coloring process as much as possible.
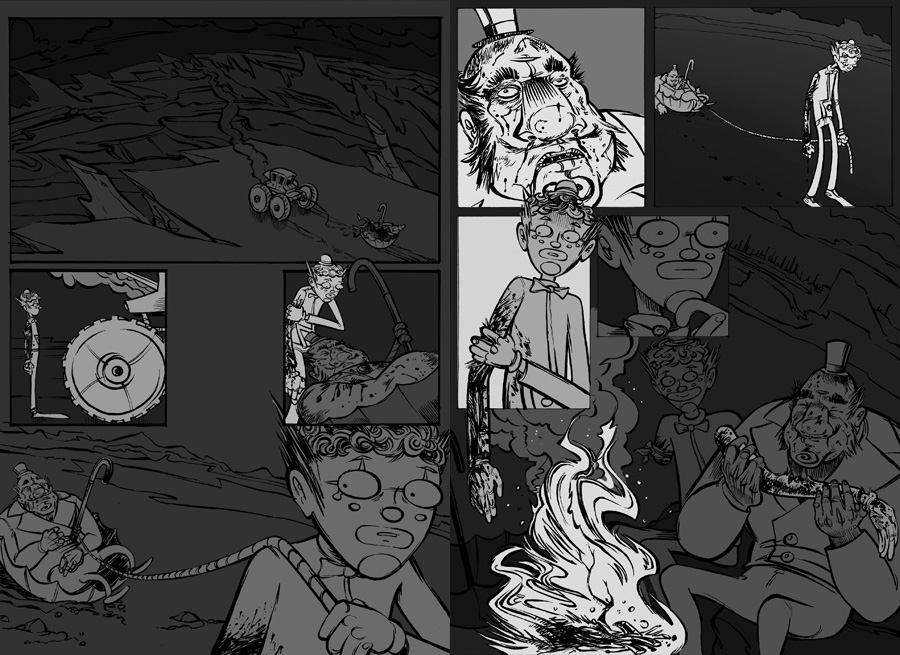
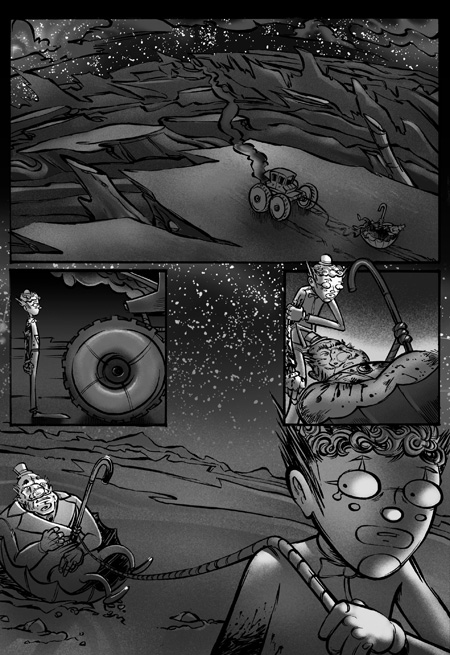
After the flats are done, and the final base colors are decided upon, I add gradations here and there. I suppose for a really super-duper quick tones tutorial, maybe we could end it here. The gradations add just a little more visual interest above crude flat colors. It would be very fast, but not quite good enough for my purposes, I'm afraid. I just use the gradations as a secondary base coat for further work. The grades start to allude to a sense of lighting, and point in the direction of richer tonalities that will be added later. All the grades were added very quickly because of all the flat color work I just did. I just use those layers as masks.
Also, I added the star fields. They're just a bunch of individually hand-drawn white dots. Sorry if there's less magic to it than you expected. But once one field is done, I tend to copy it to other pages, with a little rotate and scale to avoid something repetitive-looking.
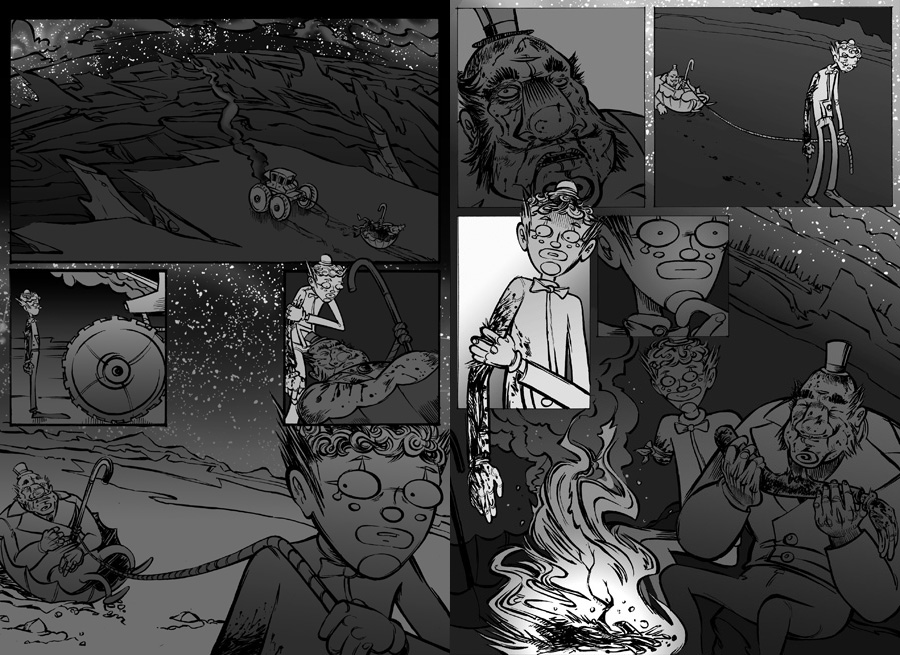
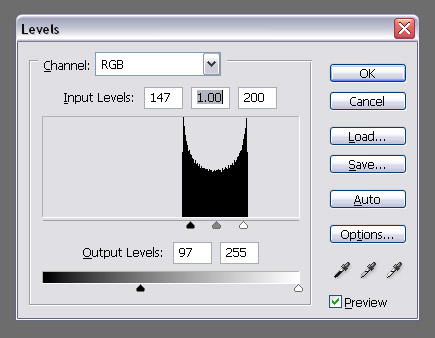
Since I'm treating the gradations like a base coat, just like the flat colors, there's no reason why I can't tweak the gradations using levels too. If I want to enhance/diminish the contrast, bump up/down the lightness, or make a tighter “snap” in the grade's transition, all I have to do is select that gradation's layer and play with the levels. That's the great thing about working in grayscale. A color can only be either darker, or lighter. Not more reddish, or greenish, or more intense. It is a one dimensional color space. I generally end up doing all the gradation refinements using levels. There's no way you could do that with a color document. You'd just have to create a new gradation from scratch each time.
Here's a little exercise that may help you to start thinking differently about working with grayscale gradations, or even about working in grayscale in general.
Let's say you put down a very simple, bland gradation, like the one on the left. You would rather see something like the one on the right. Stronger contrast, more “snap” to it in the dark areas, and the darkest color is drawn out longer before the grade starts. How will you go about it?

The obvious solution would be to open the gradation editor and place color markers in the right locations with the colors you want. This can be a huge pain, especially since you can't really see what the gradation looks like in your work until you apply it. It may not actually turn out right, and you'll have to go back and do this again.
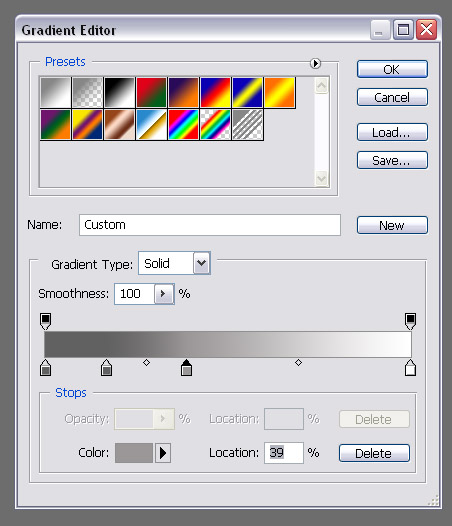
Instead, you can just edit the levels of the simple gradation which has already been applied to your work. To me, this is a much more fluid way to go about it. You can watch the gradation change in your work, real time. Another thing is, you may not even actually know what look you're going for until you see it appear, just by playing around with it. The secret is, if you understand levels, you can use them to turn any gradation into any other gradation, no matter how different. You can even invert the colors (making blacks turn white, and vice versa) by taking the arrows on the bottom and switching their positions. Try it out. I generally don't use the gradation editor that much. I usually just paint with one simple gradation, then modify the levels.
Now that all the base work is done, and the gradations have been tweaked to their final state, I switch from Photoshop to Painter to do the hand-drawn highlights and textures. I'm not telling you to go out and buy Painter. Photoshop would be perfectly serviceable for this phase. I just happen to like the array of illustrative tools available in Painter, which are far more diverse than in Photoshop.
Before I switch over, I save a copy of the .psd to use in Painter only (yeah, Painter opens PSDs). I do this just as a safety measure, since Painter can do some funny things with the text layers.
Then I go around the image and apply highlights here and there, punching up the visuals overall, adding texture and other neat stuff. Again, using the layers that are already there for masking purposes (in Painter, right-click a layer, “Select Layer Transparency”. Or, check “Preserve Transparency”. Careful with that though. Make sure to uncheck it when you're done.) Again, not going too crazy. I'm being very judicious with what I choose to render, and how much I put into it. I could spend days doing this stuff if I didn't exercise self-control.
I'm generally using a modified airbrush for all this. Sorry, only one page here. I forgot to save the WIP for the other. You get the idea though.
Now I bring it back into Photoshop to finalize everything. A few more highlights with some Photoshop brushes, and a final levels tweak of some panels. Also, I add some tones to the line art in some places, for further visual excitement. Often I do this to give a sense of atmospherics. Just use the magic wand at a high tolerance, and click the black part of the line layer. Then make a new layer on top, and color as you see fit.
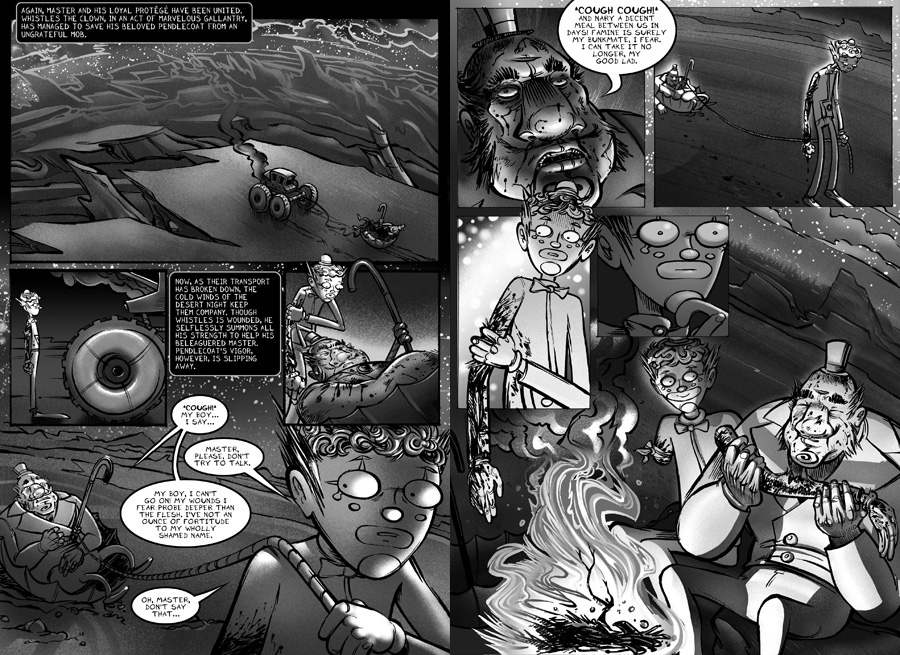
So that's it. Fairly painless process, with exciting results. If it seems like I've glossed over a lot, I probably have. My intent was just to show you the broad strokes of the process, and get you thinking about how you might approach your own take on it. Things like how I decide to highlight objects, and the rationale for certain color choices, all that stuff is a little beyond this tutorial. I could write a lot more on the subtleties of shading and highlighting, and using tone to convey form. Maybe I will in greater depth in a later tutorial.
|
